CSDCAS Final Decisions
All CSDCAS participating programs agree to provide their final decision data to CAPCSD annually in WebAdMIT. One of the following final decision codes must be assigned to each verified applicant:
- Denied: Applicant not offered admission for one or more of the following: did not meet admissions requirements, no seats available and therefore not removed from the waitlist, other reasons as determined by the program
- Offer Withdrawn: Institution revoked offer of admission. This is commonly done if the applicant did not complete additional requirements.
- Offer Declined: Applicant offered admission but did not accept. This could include a student who initially accepted and then decided not to attend.
- Applicant Withdrew: Applicant withdrew application before a degree program admissions decision was made. This could include applications that were incomplete and never considered in the admissions process or applicants that asked to be removed from a wait-list before a final decision was made.
- Deferred: Applicant applied in current cycle but offer of admission deferred to the next cycle.
- Matriculated: Applicant offered admission to your program and enrolled in that program.
All other decisions (Offer Accepted, Offer Made, Interviewed, and Wait-Listed) are not final decisions and applications remaining in those categories need to be assigned to one of the final decision codes above. Applicants without a verified status (in progress, complete, received, on hold, etc.) do not need a decision code if you did not review them.
There are 2 ways to complete the final decisions in WebAdMIT
Option 1: Update Final Decisions in WebAdMIT using Local Statuses
If you already use Local Statuses as a part of your review process, you probably have this set up already. You just need to make sure that your Local Statuses include a Final Decision. Once you add this to the Local Status it will be applied to all applicants with that status automatically.
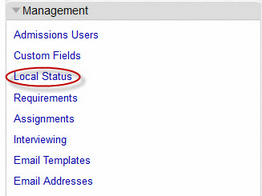
If you don't use them yet, you can create Local Statuses from the Local Status option in the Management section of the menu bar located on the left hand side of WebAdMIT.
You will see a list of all your Local Statuses, so that you may edit them.
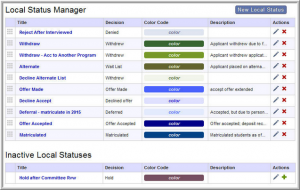
To create a new local status from this screen, click on the New Local Status button.
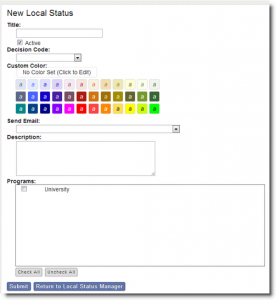
From the New Local Status page, you can configure your new status to best fit the needs of the program(s). When you have finished, click the Submit button to save. Options include:
- Title – This is the name of the Local Status and will remain internal to WebAdMIT.
- Decision Code – Allows you to map your Local Status to a Decision Code for annual reporting. The Decision Codes are the universal statuses that have been establish by CSDCAS
- Custom Color – Allows you to set a color for each Local Status to help identify the status on the dashboard.
- Send Email – Allows you to attach a previously created Email Template to your status. When you change an applicant or group of applicants to this status, a prompt will appear that asks if you would like to send the applicable email. The Email Template must be created for this option to appear.
- Description – Allows you to enter information that describes what the status means.
- Programs – Select the program(s) that you want associated with the Local Status. If a program is left unchecked, it will not appear as an option when attempting to change the Local Status of an applicant to that program.
After you have created local statuses that include final decision codes (see list of final decisions above), you then need to move your applicants into those local statuses using one of these two options:
- You can move applicants into the appropriate status in batch by going to the Applicant Search page. From here you can use the filters to get the list of applicants that you need to update, and then go to the Search Actions menu and select Change Checked Applicants' Status. This will allow you to move a group of applicants to a particular status all at once.
- If you have this data in a different system, you can also import a list of your applicants to the WebAdMIT Clipboard in batch. You will need to upload a .cvs file with the applicant IDs to the clipboard and then move them from the clipboard to the local status that is attached to the appropriate decision code.
To verify that you are done, search your applicants for those with an Application Status of Verified and a Decision Code of None. When you have no more applicants that fit this search criteria, you are done! Applicants without a verified status do not need a decision code.
Option 2: Update Final Decisions in WebAdMIT Using the Decisions API Feature
Use the Decisions API feature to build integrations into WebAdMIT from other systems. This allows decisions made in your SIS or ERP to be moved into WebAdMIT without doing data entry for each student. The documentation for the API can be found in the Developer Resource Center
- The creation of an API will enable IT staff at participating programs to build integrations into WebAdMIT from other systems. It will not, however, create those integrations. Staff at each program wishing to use the API will write software to create the integrations.
- Currently, WebAdMIT is designed to change decisions automatically when local statuses are set. WebAdMIT cannot both update decisions directly from other systems and from local statuses without causing a conflict. Therefore, the API will be set up so that only those applicants with designations set to a local status of “None” may be updated by the API.